
Orca Slicer is an advanced and feature-rich slicing software designed for 3D printing enthusiasts who seek enhanced customization and control over their prints. Developed as an open-source fork of Bambu Studio, it offers additional capabilities such as advanced calibration, precise wall adjustments, and better support for multiple 3D printers. This guide will take you through the entire process of using Orca Slicer, from downloading and setup to slicing and optimizing your 3D prints. Whether you’re a beginner or an experienced user, this article will provide detailed insights into making the most out of Orca Slicer.
Steps to Use Orca Slicer:
Here are the steps to use the ORCA slicer:
- Visit GitHub Orca Slicer and download the latest version for your OS (Windows, macOS, or Linux).
- Install and launch the software.
- Choose your 3D printer from the list or manually enter its settings. Select the filament type for optimized print settings.
- Drag and drop your STL, OBJ, or 3MF file into the interface. Use “File > Import” if needed.
- Adjust the Model Position and Orientation with the Scale, rotate, or move the model for better print stability.
- Use auto-orientation to optimize placement.
- Configure Print Settings to adjust layer height, infill density, and wall thickness.
- Enable supports for overhanging parts if needed.
- Click “Slice Plate” to generate the G-code for the printer. Review estimated print time and material usage.
- Use the layer slider to inspect print paths. Check for overhangs or print defects before exporting.
- Save the G-code file to an SD card or USB. If using Wi-Fi-enabled printers, send the file directly
- Load the file on your 3D printer and begin printing. If connected via Wi-Fi, monitor and adjust settings remotely
By following these simple steps, you can efficiently use Orca Slicer to prepare and print high-quality 3D models!
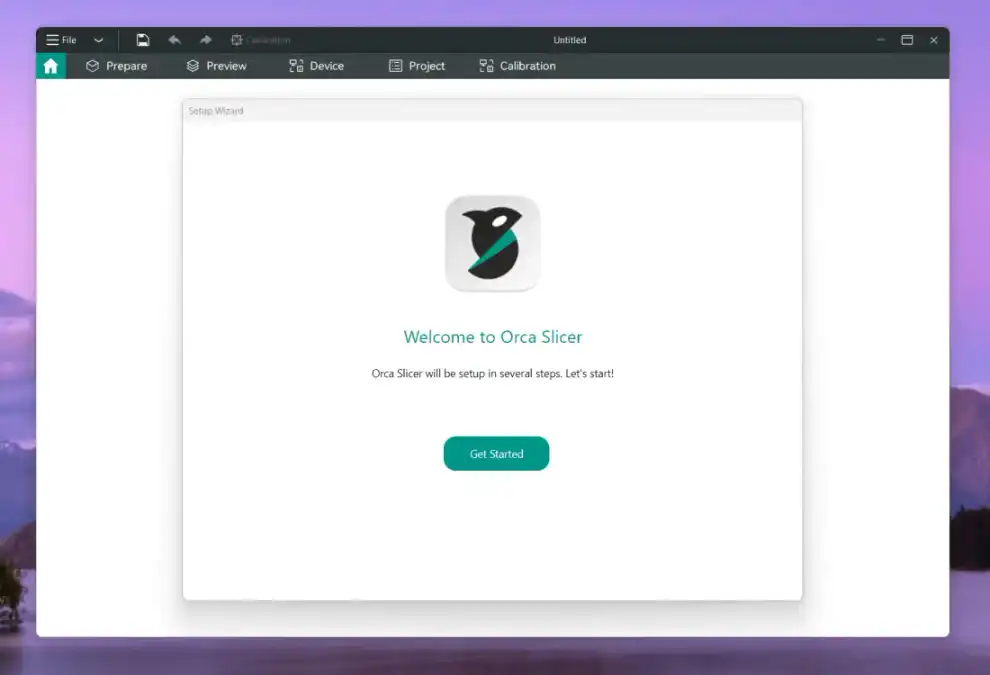
Downloading and Installing Orca Slicer:
Getting started with Orca Slicer begins with downloading and installing the software.
- Download from GitHub: Visit the Orca Slicer GitHub page and scroll down to the “Assets” section.
- Choose the Correct Version: Download the appropriate file for your operating system (Windows, macOS, or Linux).
- Installation Process:
- Windows: Run the .exe file and follow the on-screen instructions.
- Mac: Download the .dmg file, open it, and move Orca Slicer to the Applications folder.
- Linux: Download the .AppImage file and grant executable permissions (chmod +x).
- Launch and Initial Setup:
- Open the software and select your preferred language.
- Choose a region for synchronization and account preferences.
After installation, Orca Slicer is ready for configuration and printer setup.
Start Using Orca Slicer: Step-by-Step Guide
1) Import Your Model:
Orca Slicer supports a wide range of 3D model formats, including STL, OBJ, and 3MF. Whether you design your own models using software like TinkerCad or Blender or download them from platforms like Printables, Cults 3D, or Thangs, importing them into Orca Slicer is effortless. Simply drag and drop your file into the interface or use the File > Import option. The model will instantly appear in the slicer workspace, where you can begin making adjustments. This streamlined process ensures that even beginners can quickly get started with their prints without unnecessary complexity.
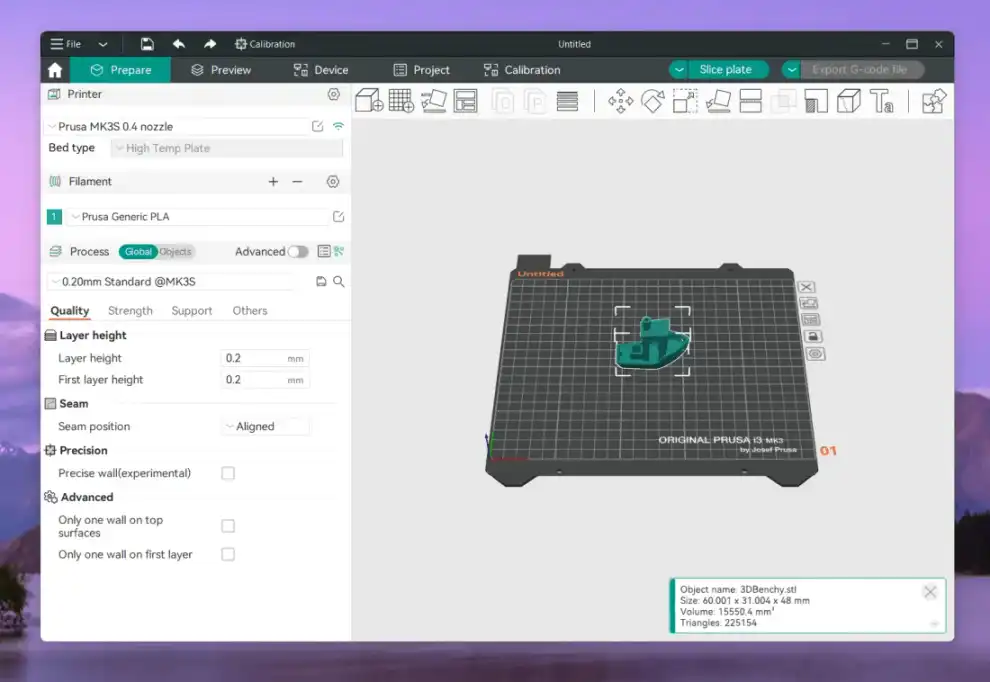
2) Position and Adjust Your Model:
Once the model is loaded, it’s essential to optimize its position for successful printing. Adjustments include scaling, rotation, and movement to ensure proper adhesion to the print bed and reduce the need for excessive support structures. Users can fine-tune parameters such as layer height, print speed, and wall thickness based on the filament and printer settings. Orca Slicer’s auto-orientation tool helps arrange the model for better stability and print accuracy. While default settings work well for most cases, fine-tuning them can significantly improve print quality and minimize print failures.
3) Slice and Examine:
Slicing is the process of converting a 3D model into layers and generating G-code instructions for the printer. Orca Slicer’s advanced algorithms optimize layer structures, automatically adjusting shell detection, z-seam hiding, and support placement. Once slicing is complete, users can preview the sliced model layer by layer using the vertical and horizontal sliders. The slicer provides insights into estimated print time, material usage, and print stability. This detailed preview ensures that users can identify potential printing issues and make corrections before proceeding with the final print, saving both time and materials.
4) Export the G-Code:
Once satisfied with the sliced model, the next step is to export the G-code. This file contains the instructions that guide the 3D printer through the entire printing process. In Orca Slicer, users can click on the “Export G-code file” button to save the file on their computer. If the printer is connected via Wi-Fi, OctoPrint, or Klipper, the sliced file can be sent directly to the printer for remote printing. Alternatively, users can transfer the G-code manually using an SD card or USB drive, depending on the printer’s compatibility.
5) Monitor Your Print:
Orca Slicer offers real-time print monitoring features, allowing users to track the progress of their prints from within the slicer. If connected via OctoPrint, Klipper, or Mainsail, users can view live print status, control settings remotely, and make adjustments if needed. The built-in Device tab provides a direct interface to monitor print temperature, print speed, and layer progress. Additionally, integration with OctoEverywhere enables remote monitoring from anywhere, ensuring that users can pause or stop prints if issues arise. This feature helps prevent wasted material and improves overall printing efficiency.
Setting Up Orca Slicer for Your 3D Printer:
Configuring Orca Slicer correctly ensures the best printing results.
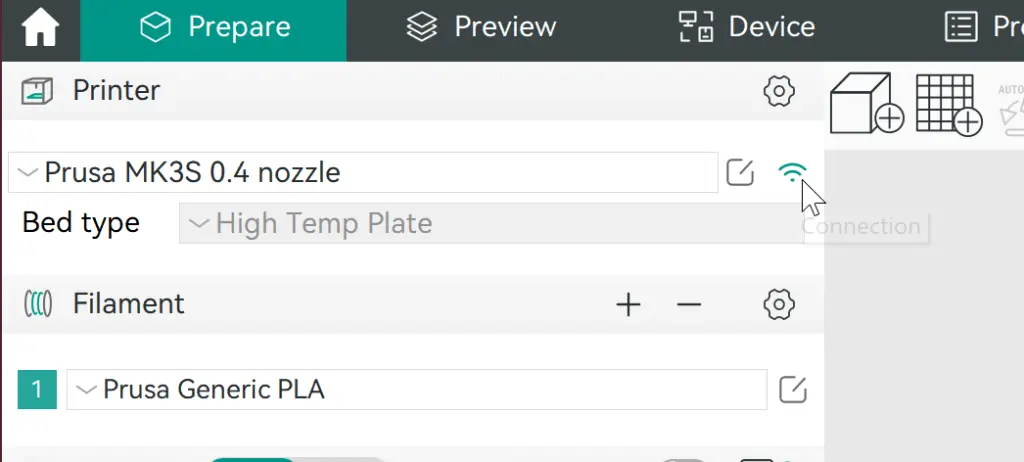
- Selecting Your 3D Printer:
- Upon launching, you’ll see a list of available 3D printers.
- Use the search bar to quickly find your printer model.
- If your printer isn’t listed, select “Custom Printer” and manually enter specifications.
- Filament Selection:
- Choose the filament type that matches your print material (PLA, ABS, PETG, etc.).
- Pre-configured settings for each material help ensure optimal print quality.
- Network Plugin Installation:
- The Bambu network plugin allows remote printing and monitoring.
- It enables Wi-Fi connectivity for supported printers.
With your printer and filament configured, you’re ready to import and prepare 3D models.
Conclusion:
Orca Slicer is a powerful and versatile slicing tool that provides more control and customization than many other slicers. By following this guide, you can download, install, configure, and optimize your prints effectively. Whether you are a beginner or an expert, leveraging the advanced features of Orca Slicer will enhance your 3D printing experience, leading to higher-quality prints and better efficiency.
FAQs:
Yes, Orca Slicer is completely free and open-source.
Orca Slicer supports many printers, including those running Klipper and Marlin firmware.
Ensure the bed is clean, use adhesives like glue or tape, and adjust the bed temperature.
It optimizes outer wall spacing for improved dimensional accuracy and print quality.
Yes, Orca Slicer integrates with OctoPrint and Klipper for remote print monitoring.


